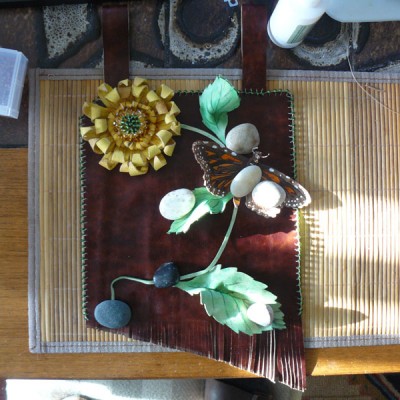
This was a very small leather wall hanging project for a house with limited wall space.
Cutting out the leaves and flower petals from tooling leather with leather shears is a lot like paper dolls…but much harder on the hands! Using a 2-3 oz. leather for these projects is key. The thin leather is easier to cut and it moulds nicely when wet. I use a V-groove chisel to get fine lines and make the leather more pliable.
The centre of the flower is beaded elk hide which I sewed on to a flat backing of tooling leather. After all the pieces had been dyed it got stitched and leather glued into the centre of the petals.
Leather dye is great…it is permanent to any skin or hide. I now wear gloves when I work.
Generally, I start the moulding process as I am dying the pieces. They stiffen and if I don’t like the way they lay I can always re-wet them and position the pieces differently.
On many projects I burn the edges and lines with my wood-burner. (The butterfly on this piece is burned)
Assembly starts with creating the wall-hanging backing. The hand- beaded piece gets stitched onto straps which hang from a wooden dowel. I chose elk ties and hanger for this piece because of the elk centre in the flower. Elk is an extremely tough yet stretchy hide and I only use it as ties on small pieces. Moose is used on large pieces (much less stretchy and stronger, too), while deer can be used on any project depending on the weight of the hide.
Once my backing was finished I position my pieces, stitching and gluing and positioning them with small stones as they dried into place. I had already made the butterfly so that was a matter of just putting it onto the piece.
…and ready to be displayed!


