Fenelon Station Gallery
  • Home
  • Gallery History
  • Artists
    • All Artists
    • Janice Addison
    • Marilyn Britt
    • Marilyn Clayton
    • Sandy Cogar
    • Lynn Cragg
    • Mary Firth
    • Linda Harris
    • Faye Jacobs
    • R. John Leggett
    • Janet McDougall
    • Sandi McNeil
    • Dagmar Pinney
    • Maud Skoog
    • Terry Sullivan
    • Janet Tysiak
    • Anne-Marie Van Brunt
    • Morris Young
  • Gallery Calendar
  • Application
  • News & Events
  • Location
    • Privacy Policy

Archive for stained glass

Making a glass bird with Mary Firth

By Station Gallery
 on September 18, 2022
 with no comments

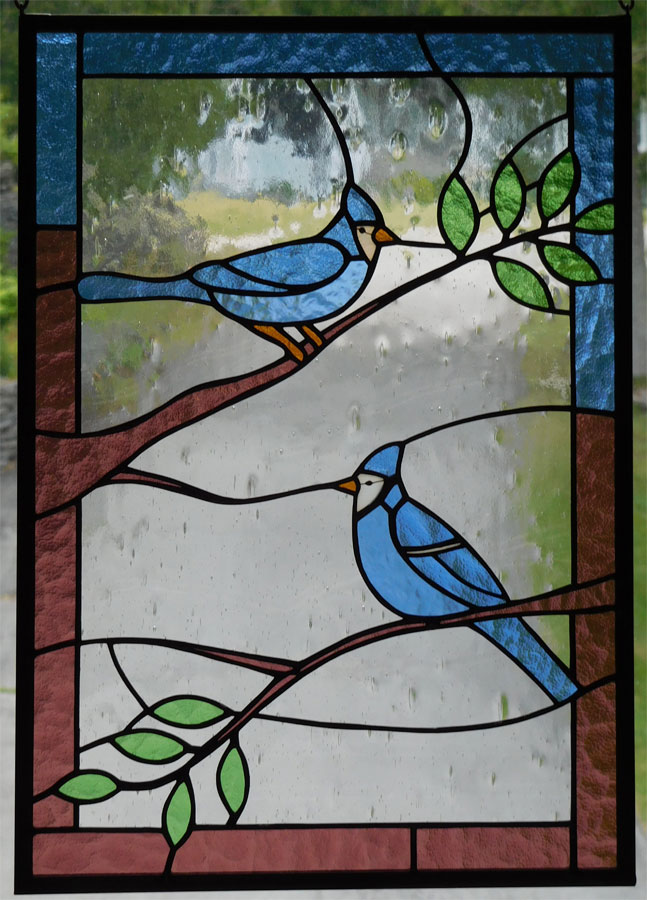
Mary Firth gives us a quick lesson on the stages needed to make a stained glass masterpiece.

Mary Firth1

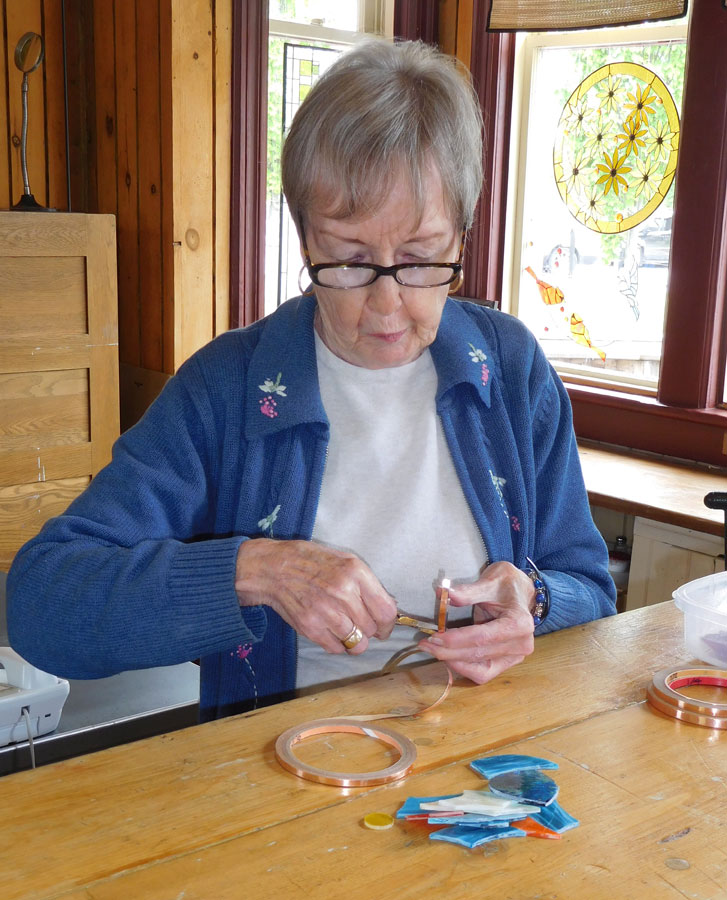
These pieces of glass have been cut out and the edges ground smooth.

Wrapping glass with Copper foil

Wrapping glass with Copper foil

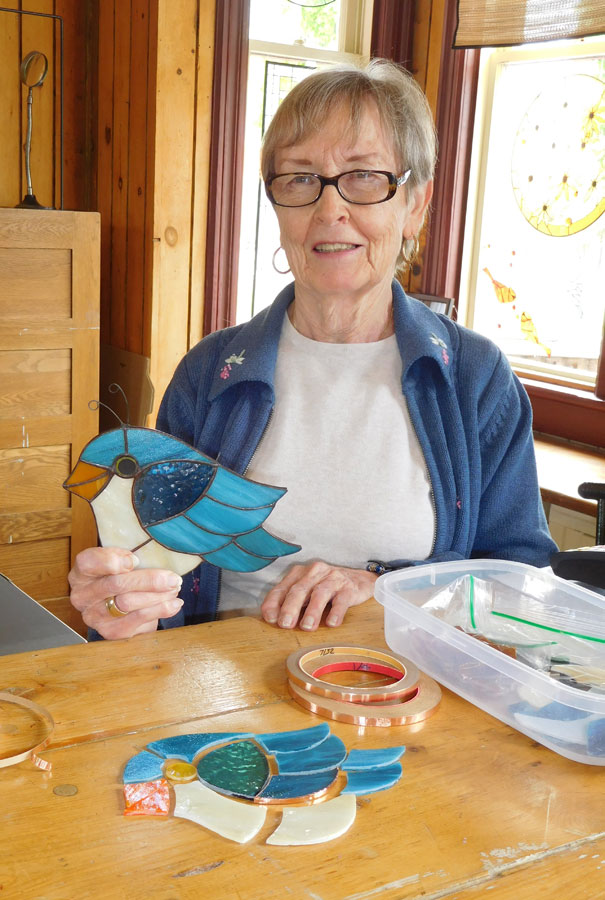
Each piece is then wrapped in copper foil and pressed tightly onto the surface. Flux is brushed on the foil then all the pieces are tacked together. 60/40 solder is used . A smooth line of solder is applied with a #8 soldering tip. The reverse side gets the some treatment. The outside edges then get flux applied and a smooth bead of solder brings the soldering to a finish except for a small loop for hanging the piece. Surfaces must be cleaned thoroughly before using patina to darken the solder, then the piece is ready for polishing. Et voila! a masterpiece!

Mary Firth

Mary with the finished bird.

In categories stained glass with no comments

Installation Day – Anne Marie Van Brunt

By Station Gallery
 on July 24, 2019
 with no comments

During the last few years I have completed several Stained Glass windows for homes around the region.

Nothing is as exciting as the day of installation!

When designing a window for the client I have many consultation meetings to “look inside the clients head” to determine their “vision” of this special, very personal, addition to their home.

The measurements are taken, the computer drawing is made, and once the customer confirms satisfaction, the file is sent to a printing company to plot the actual size, and then the template is fitted to the actual window. Once size is confirmed the glass is chosen and the window is built on the template to ensure correct sizing.

Then the day comes when the Stained Glass window is set in place.

After all the hard work I get to see the look on the clients face, which shows me that I have gotten it right!

This picture shows one of those special moments!

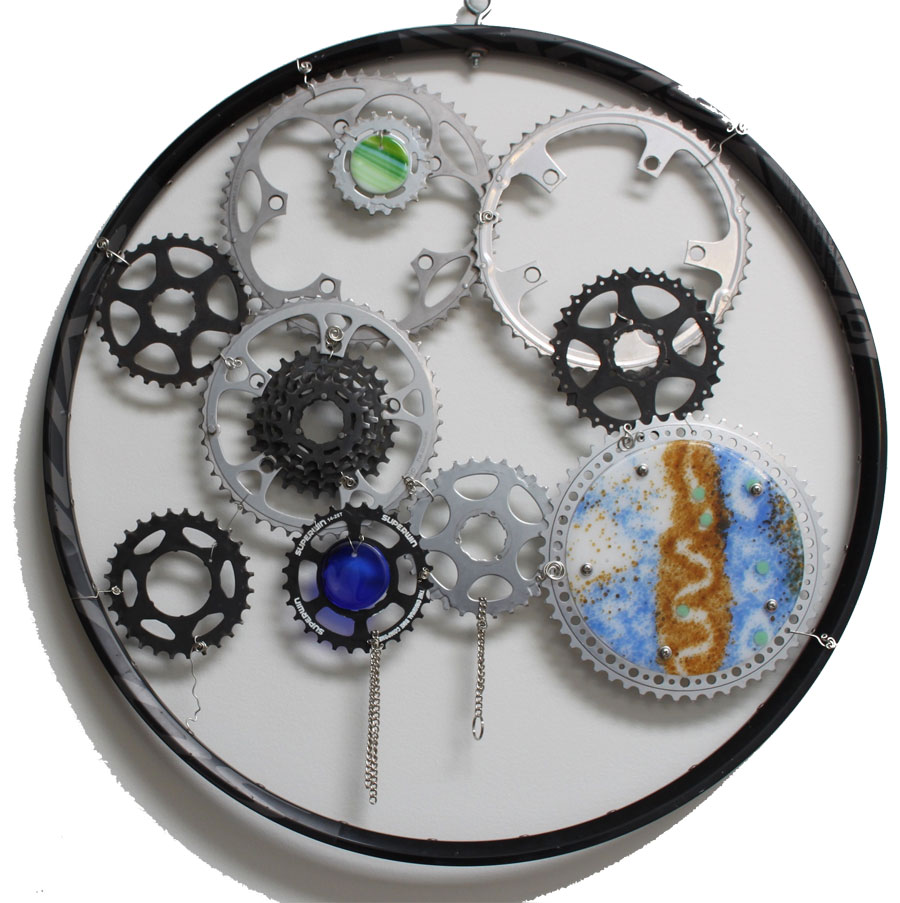
In addition to windows, I love to experiment with glass combinations and processes in my kiln; creating jewelry, bowls, wall art, garden art, and to combine the glass with bicycle parts to see what I can dream up!

Come on in to the Fenelon Station Gallery to see some of my works of art!

Anne-Marie will be in the gallery next on the 26th July.

In categories Artists, stained glass with no comments

Old to New – Janet Tysiak

By Station Gallery
 on July 3, 2019
 with no comments

Honouring the artists before me.

Once a stained glass panel reaches it’s 100th birthday, the lead gets tired and it’s weakness causes the panel to sag and break from the weight of the glass.  Rebuilding the panel is a dirty and time-consuming job…not one that many people choose to take on.

Old, broken and filthy glass was removed from an area century home.  Family members asked me to make a surprise anniversary gift for their parents from the boxes of broken windows that were removed from their family home.

Step 1.  Taking apart and cleaning years of grime, paint spatter and caulking from the glass.

Step-1

Step-1

Step 2.  Design a new pattern…one limited by the size of the glass that was available.  I did not introduce any new glass to this project.

Step-2

Step-2

Step 3.  Rebuild.

Step-3

Step-3

Step 4.   Enjoy the panel for another 100 years!  Perhaps someone will honour my work and remake the panel when it needs requires a rebuild.  We can only hope.

Did I enjoy working on this project?  I certainly did!

40th-Anniversary-gift

After 40 years of marriage, they still look happy…especially after receiving this wonderful gift from their children!

Janet will be in the gallery next on August 17th.

In categories stained glass with no comments

Creating a Pond Panel – Mary Firth

By Station Gallery
 on May 15, 2019
 with no comments

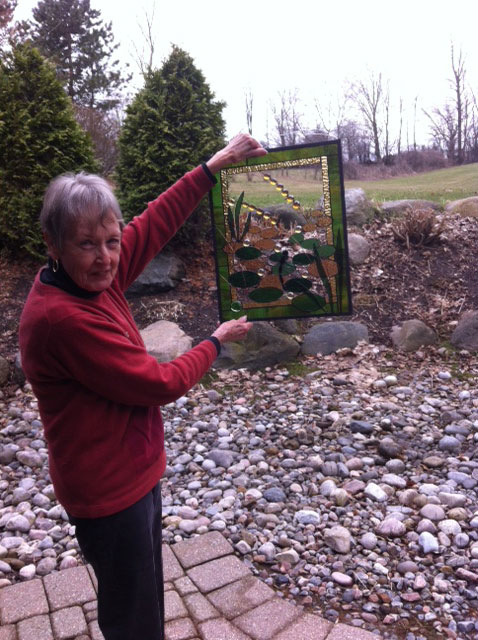
Many of my panels have no background glass.  This unusual technique allows me freer design; it is much more work but results in something quite unique. Overlapping glass gives a greater range of colour; it also is necessary to hold the piece together. I make use of copper wire as well for the same reason.

So to begin a new panel, I choose a border colour, cut the needed pieces, and lay them out on my work board where I have secured wood strips to keep the border square and in place.

Next step is to cut out ovals of varying sizes and colours and lay them in the open space, roughly where they will be in the finished piece. Some pieces will overlap each other and the border. All these pieces need to be ground to smooth the rough edges,then taped. Those pieces that overlap the border have to be embedded in the border; so it race the shape of the oval, then cut that shape from the border. The border pieces must be ground smooth and taped, and a solder bead applied to the straight edges. At this point I tack solder all the border pieces. The ovals (already taped) each need a solder bead. They are then cleaned and black patina applied. Each piece is thoroughly cleaned again and laid out on the board in the approximate place in the panel, overlapping some and soldering those pieces which are partially in the border. All the loose ovals have to be discretely soldered together and I have to be really careful not to let the flux get between the pieces of glass. ( it can look pretty grungy – the voice of experience!)
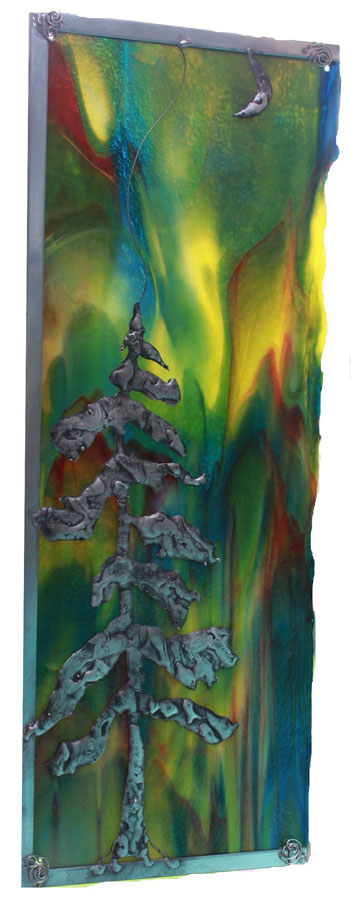
Copper wire ‘reeds’ and glass globs which are already taped, soldered, darkened and cleaned, are added to give strength to the panel. A zinc came is soldered around the piece and small loops applied for hanging. I then flip the panel over and solder all the joins from the back and finish neatly the seams of the border. All the fresh soldering must be cleaned and darkened, being really careful again not to let any flux or patina get between the pieces of glass.
Almost finished! I wash the panel, dry it (and use thin pieces of really absorbent cardboard to remove any water between the ovals). The zinc border is then painted with black Tremclad latex. The dragonfly which was made separately and has gone through the same processes as the ovals is carefully soldered in place and the solder spots cleaned and darkened. The piece is finished except for a bit of polishing.
This technique is far more work and very time consuming, but I love the final result. And so do many others – I have sold many ‘ponds’ over the years. And every one is unique as I create as I work.

Mary is working in the gallery on our opening day, May 18th!  Pop in and say hello.

In categories Artists, stained glass with no comments

Janet Tysiak – Reduce, Reuse and Recycle

By Station Gallery
 on August 15, 2018
 with no comments

Reduce, Reuse and Recycle…the best way to procrastinate!

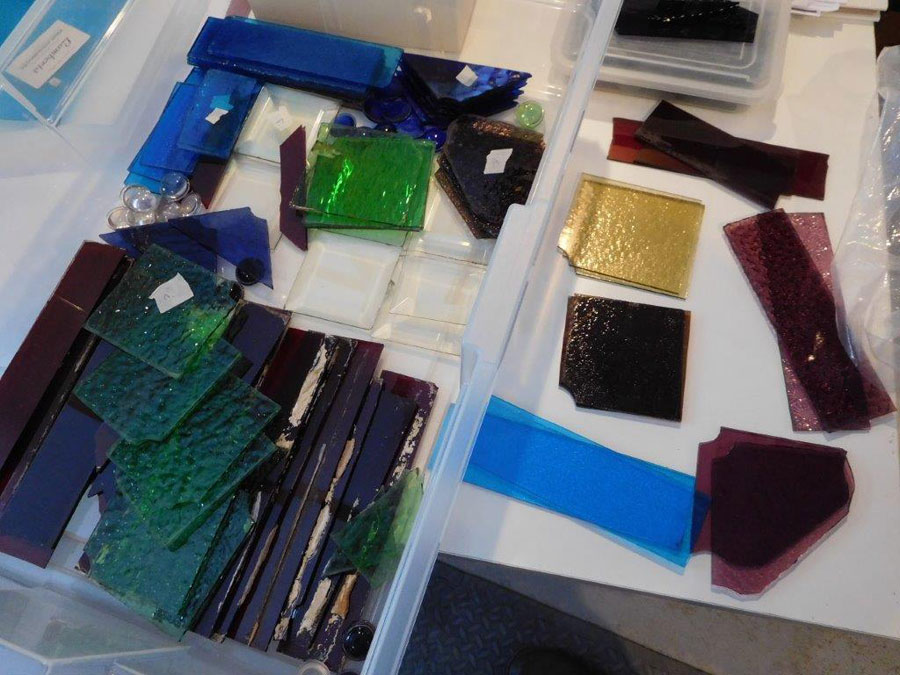
With each project, I pull upwards of 50 pieces of glass looking for the right combination of colours and textures needed to design the perfect glass panel.  Editing the choices can sometimes be time consuming as each choice affects the mood and flow of the final design.  I’ve been making glass projects for over 25 years, amassing a nice collection of glass.  Some pieces are so precious that I pull them from the shelf, enjoy their beautiful details and put them back again.  I’ve decided that I should REDUCE my glass stock…including the old, hand-rolled pieces I’ve been hanging onto.

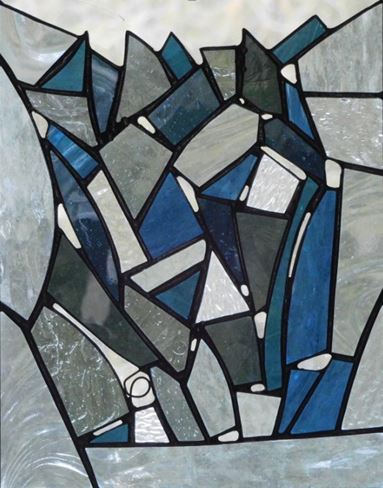
In this blue panel, one piece of grey glass still had a sticker reading, “Made in Western Germany” on it!  This is a mouth-blown glass that has a slight waviness and tiny air bubbles within…a stunning piece.

So, after I finished the panel, it’s time to clean off my workbench by placing the remaining glass back in the racks.  Instead, I decide to REUSE the glass already scattered on my table and design and build a smaller blue panel with a totally different look.

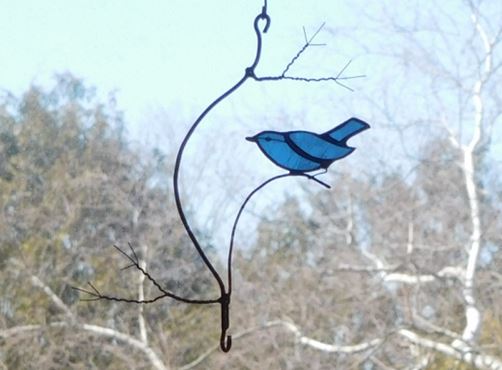
Even after finishing the smaller panel, I still have small pieces of glass to put away…but I don’t!  I choose to make little blue birds with the pieces.  I even RECYCLE the off-cuts.  All the small bits of leftovers end up in the hands of another artist who uses them in mosaic art pieces.

By now, you’ve probably realized that I would rather be making stained glass pieces, not cleaning up the work bench.  Reduce, reuse, recycle…the best way to procrastinate!

Janet will be in the gallery again on the 18th and 19th of August.

In categories Artists, stained glass with no comments

Anne-Marie Van Brunt’s Latest Creations

By Station Gallery
 on July 20, 2018
 with no comments

In 2017 I found myself expressing my artistic side in several directions, which makes perfect sense to anyone who knows me well.

My extroverted personality shows itself best when I experiment with a new expansion of my glass talents. I have to learn something new and translate it in some way to glass or I am bored.

Once I master a new direction off I go to find something new to excite me and to stimulate my creative juices!

Last year my Kawartha Trees where a hit and I kept trying different shapes and odd angles in the finished pieces. I don’t like things to be too perfect or symmetrical. My husband
commented on an especially “crooked” shape and thought it was a little weird. This happened to be the one that I loved the most out of all of the trees that I had just created. The next day at one of my shows it was the first one I sold! The  purchaser said that it was the non-­‐straight sides that appealed to her the most and immediately caught her eye!

At a bike shop one day I noticed a box of used parts and asked if I could sort through the box. I had to purchase a membership to their bike repair business so that I could salvage parts in the future, and I was happy to do so. The Bike Art that I combined with fused glass to create large wheels or bicycle riders for home décor, or to be used in your garden began that day. The only part I detest about this new medium is cleaning the grease off of the parts and chains!

Garden Art bike stakes and hangings became a major part of my shows last year and I was thrilled with the response from attendees.

In categories bile wheel art, mixed media, stained glass with no comments

Mary Firth – Stained Glass Process

By Station Gallery
 on July 20, 2017
 with no comments

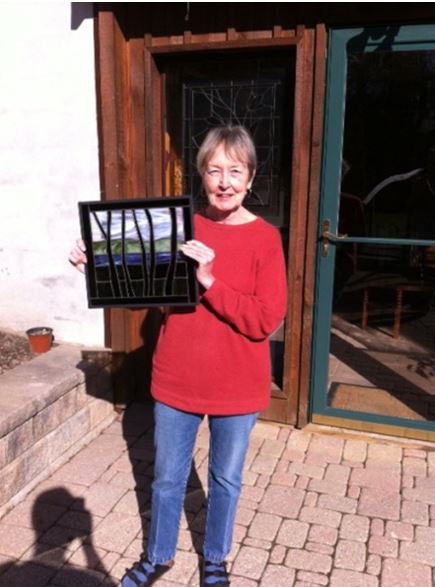
I usually create my own designs but a few years ago I saw this tiny (just over an inch square) picture in a magazine and thought it would be a good candidate for a stained glass panel – I sometimes get lazy!  So I cut out that tiny picture, modified it somewhat and am just finishing my version of the original.
After making sure I had the appropriate glass and enough came on hand to frame the finished piece, I cut and laid out the black glass border in a 12×13 jig after taping the inside edges with 7/32″ copper foil.  Next I cut out the trees, ground the edges, taped them, and after the corners of the black border were soldered I soldered the trees in place.

This gives me a relatively stable framework that can be lifted slightly so that I can slip the glass for the individual bands of colour underneath, trace the shape, cut, grind, tape and tack-solder each in place. I started at the bottom with the green-brown band a worked my way up to the sky ( which alone used 5-1/2′ of copper foil).

A finished solder bead is then applied to the face of the panel. It is then flipped over to solder the reverse. The zinc came is then cut and soldered to the black glass border.  Wire loops are soldered to the upper reverse side corners. A confession – I have never mastered darkening the fame successfully so after thoroughly cleaning the glass and applying the patina to darken the solder, and cleaning thoroughly once again, after everything is dry, I paint the zinc frame. ( a no-no, I’m sure!)I then polish the piece with furniture wax – and hope someone will buy it!

I am somewhat restricted re the size of any project now as I have to work in my apartment Kitchen. I cut glass in a 12×26″ area between the wall and the sink in front of the toaster oven – I have to tape glass there too as the light is good. (My eyesight is not so great now and I see double at times ). My grinder is beside the stove, close to the one reliable outlet on on the stove side of the kitchen and where my work board sits. Before I can solder however, I must press down the copper foil firmly on each piece of glass with a fid. That job is done on the other side of the sink. So now I’m ready to solder. The soldering iron is plugged into the same reliable outlet used by the grinder, the kettle etc. the stove top is OK except if I want to cook or bake. The whole set-up is not great, but I no longer have the luxury of a shop – great sadness!

A plug for the Scugog Library’s  annual Snowflake Sale (a fund raiser for the library which takes place in the month before Christmas). My work is there along with that of a dozen or so locals. So if you are in Port Perry, do some of your Christmas shopping at the library!

Mary will be next at the gallery on July 23rd.

In categories Artists, stained glass with no comments

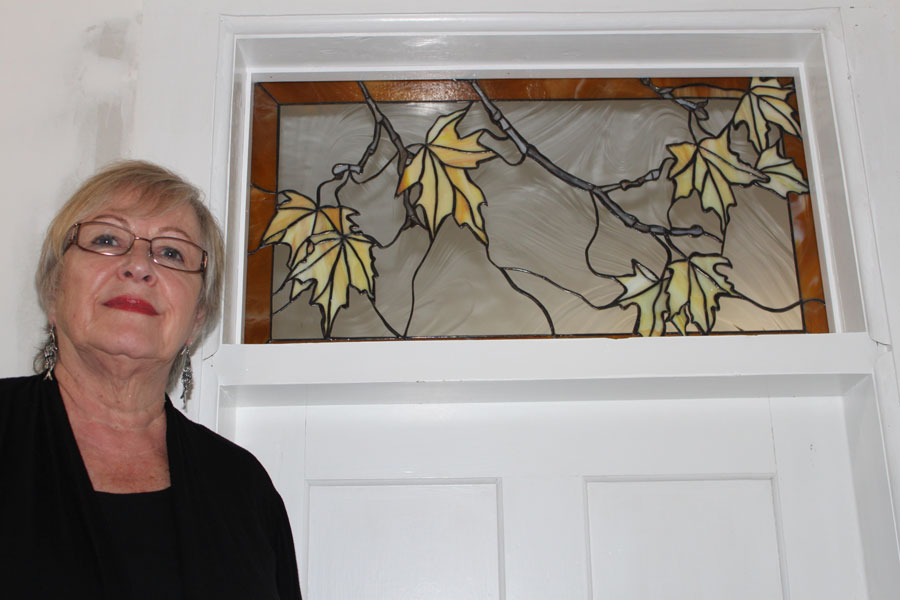
Anne-Marie Van Brunt’s Maple Leaf Vision

By Station Gallery
 on July 4, 2017
 with no comments

Last fall I was a participant in the Kawartha Art Festival in Fenelon Falls. This was my first year attending this event and I enjoyed meeting the artists from the town and area.

A couple came to talk to me about my art and asked questions about my custom Stained Glass work.

They told me that they were renovating a 100-year-old farm house in the area and wanted two transom windows created for above the doors in an inside hallway.

They gave me a sample of what they were envisioning and I followed up with several drawings created on my computer. This went back and forth a few times until we had the perfect one!

Next, they came to my home studio and picked out the glass from samples, the glass was purchased and the project began. This was a very complicated pattern that I had created and was very challenging to recreate in glass to say the least!

Everywhere I went for the two months that I was working on these windows my fingers where wrapped in bandages because I had so many cuts on my fingers.  The gold glass was particularly treacherous!

A couple of months later the windows were finished and I brought them to their home to check the fit. Thankfully they fit perfectly and the couple was over the moon with the finished product.

The look of wonder and excitement expressed on their faces as I held them in place made all those hours of cutting and grinding and fitting worthwhile.

Their Maple Leaves vision will be installed shortly when the hallway is painted and ready!

In categories Artists, stained glass with no comments

Janet Tysiak’s Fancy Scissors

By Station Gallery
 on June 7, 2017
 with no comments

My Unique Stained Glass Scissors…and no, I don’t run with them!  

Cutting Stained Glass Pattern

Janet busy cutting out the hundreds of pieces for a stained glass church window

Before building a stained glass panel, I design the pattern and make two copies of it.  I build the glass panel on top of one copy, and cut up the other copy to use as pattern pieces.  This second copy gets cut out with a special pair of lead shears.  These shears have three blades which automatically remove a thin strip of paper between the two pieces being cut, to compensate for the width of the lead came.  This allows the glass to fit together perfectly when assembled with the lead.  This process can be time consuming…and we haven’t even started cutting the glass!

Janet’s special shears…you can see where the strip of paper is removed to allow space for the lead came.

In categories Artists, jewellery, stained glass with no comments

What is Stained Glass? Janet Tysiak tells all

By Station Gallery
 on July 18, 2016
 with no comments

You may be wondering…what exactly is stained glass?

Simply answered:   Individually coloured and textured pieces of glass, arranged to form patterns or pictures.  These pieces of glass are held together with lead.  Think of it as a glass puzzle – each piece is individually cut to precisely fit a pattern.  It requires artistic skill to design appropriate and workable designs needed in order to build pleasing and durable glass projects.

Once a pattern is established, it is time to choose the glass.  This can be a lot of fun, or really overwhelming, or both!


These two glass panels are mirror images of each other…with a few small changes.  What is very obvious is how different they can look, based on glass selection.   Maybe you can start imagining your own colour combinations.  Sounds like fun doesn’t it?

Welcome to my world of stained glass.

My studio in Fenelon Falls is open year round by appointment.  705-928-4341

I’ll be in the Station Gallery on duty on July 20th.  Come on in and have a chat.  I’ll likely be keeping myself busy with my glass while I am there.

In categories Artists, Fenelon Station, stained glass with no comments
Next Page →

Follow Us:

  • Twitter
  • Facebook

Subscribe to our mailing list

* indicates required

Recent Posts

  • Making a glass bird with Mary Firth
  • Painting the Fenelon Falls Museum – Terry Sullivan
  • Making Frames – Terry Sullivan
  • Ingorance is bliss – Sandy Cogar
  • Marilyn Clayton and 8th MOC Designs

Categories

Fenelon Station Gallery
Copyright © 2023 All Rights Reserved

Designed by m. sullivan