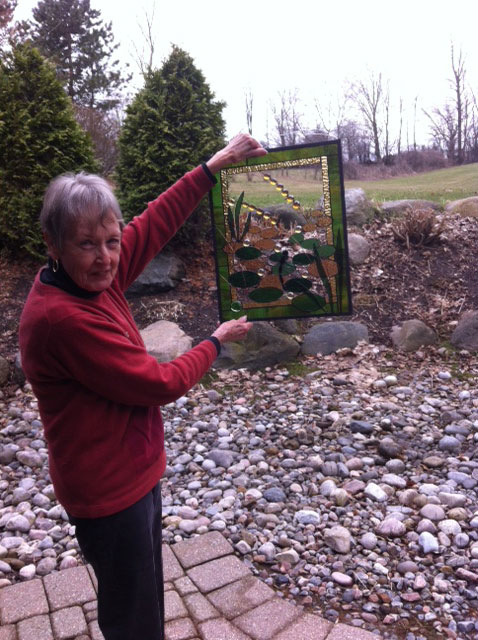
 Many of my panels have no background glass. This unusual technique allows me freer design; it is much more work but results in something quite unique. Overlapping glass gives a greater range of colour; it also is necessary to hold the piece together. I make use of copper wire as well for the same reason.
So to begin a new panel, I choose a border colour, cut the needed pieces, and lay them out on my work board where I have secured wood strips to keep the border square and in place.
Next step is to cut out ovals of varying sizes and colours and lay them in the open space, roughly where they will be in the finished piece. Some pieces will overlap each other and the border. All these pieces need to be ground to smooth the rough edges,then taped. Those pieces that overlap the border have to be embedded in the border; so it race the shape of the oval, then cut that shape from the border. The border pieces must be ground smooth and taped, and a solder bead applied to the straight edges. At this point I tack solder all the border pieces. The ovals (already taped) each need a solder bead. They are then cleaned and black patina applied. Each piece is thoroughly cleaned again and laid out on the board in the approximate place in the panel, overlapping some and soldering those pieces which are partially in the border. All the loose ovals have to be discretely soldered together and I have to be really careful not to let the flux get between the pieces of glass. ( it can look pretty grungy – the voice of experience!)
 Copper wire ‘reeds’ and glass globs which are already taped, soldered, darkened and cleaned, are added to give strength to the panel. A zinc came is soldered around the piece and small loops applied for hanging. I then flip the panel over and solder all the joins from the back and finish neatly the seams of the border. All the fresh soldering must be cleaned and darkened, being really careful again not to let any flux or patina get between the pieces of glass.
Almost finished! I wash the panel, dry it (and use thin pieces of really absorbent cardboard to remove any water between the ovals). The zinc border is then painted with black Tremclad latex. The dragonfly which was made separately and has gone through the same processes as the ovals is carefully soldered in place and the solder spots cleaned and darkened. The piece is finished except for a bit of polishing.
This technique is far more work and very time consuming, but I love the final result. And so do many others – I have sold many ‘ponds’ over the years. And every one is unique as I create as I work.
Mary is working in the gallery on our opening day, May 18th! Pop in and say hello.

